8.1. Payment Cashier Configuration

Introduction

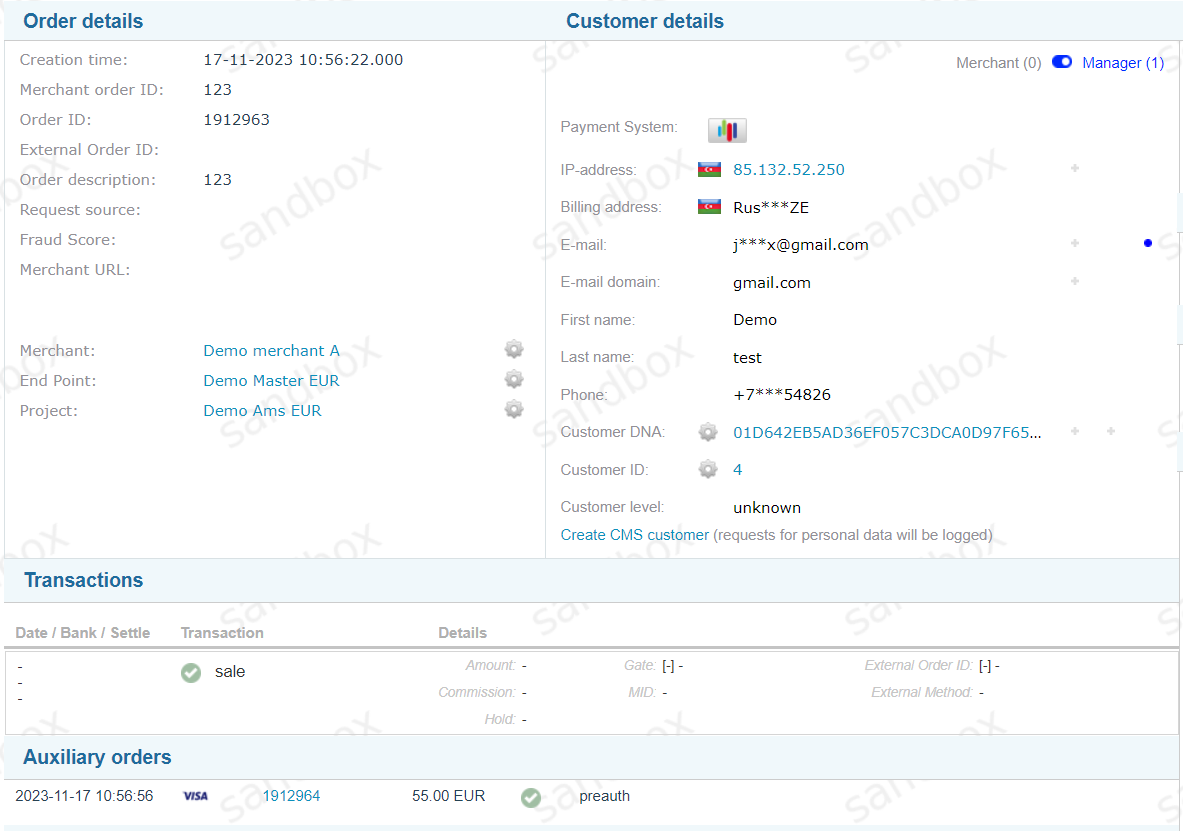
Payment Cashier integration requires a configured Master Endpoint to display Cashier Form (also called Parallel Form) and configured Auxiliary Endpoints for each payment method to be displayed on the Parallel Form. The Manager can configure on Master Endpoint which transaction type (sale, preauth) will be initiated for each payment method and for which list of countries this payment method will be displayed. There can be several payment methods, such as Credit Card, Bank Transfer, etc. on the same Parallel Form available for the Payer to choose from.

Parallel Form Master Endpoint Settings

There is an instruction for Project configuration to use Parallel Form:

1. To configure Parallel Form that includes payment methods in different currencies, at least one Project for each currency should be created. For example, if payments in USD, EUR and JPY are to be processed, 3 different Projects must be created accordingly.

2. After Projects were created, all required Endpoints for provided payment methods have to be created and connected to appropriate Projects. All these Endpoints will be auxiliary to Master Endpoint and called Auxiliary Endpoints.

3. To create Master Endpoint, go to (Settings -> Configuration -> Master Endpoints -> + Master Endpoint).

4. Auxiliary Endpoints, which represent payment methods, must be connected to the Master Endpoint to be displayed on the Parallel Form. This can be done in Master Endpoint settings. To add new Auxiliary Endpoint, press the Add button. The form with three following fields should be filled: “Endpoint”, “Payment method” and “Payment method reference name”. In the “Endpoint” field one of the available Endpoints should be chosen. The “Payment method” field defines the name of the payment method shown on the relevant Parallel Form tab. “Payment method reference name” field defines the internal reference name of this payment method, which can be used for customization of this payment method display style in Parallel Form template.

5. After the Auxiliary Endpoint is added, the Manager may also select which transaction type will be initiated (sale, preauth) and set the list of countries where this payment method will be available. To select the list of countries, press the three-points button that stays opposite of the Auxiliary Endpoint field.

6. To change the default Parallel Form template, go to the Master Endpoint (Master endpoint details screen -> Common -> Edit -> Payment form template). To change the default payment form template for particular payment method, go to the respective Auxiliary Endpoint details screen and set the corresponding Payment form template. Such form template returning algorithm is used for all kinds of form templates: payment, waiting and finish templates. See Payment Page Display Logic in the next section for details.

Note

It is also possible to set the payment form template in the Project settings (Project details screen -> Common -> Edit -> Payment form template). When the request is sent to Master Endpoint without a specified Parallel Form template, Master Endpoint inherit Parallel Form template from the Project settings. This option is not recommended, because usually both Master Endpoint and Auxiliary Endpoints are connected to the same Project and this way all Endpoints will inherit the same form template.


Below is an example of configured Master Endpoint with multiple available payment methods represented by Auxiliary Endpoints connected to it:

Master Endpoint

Below is an example of a successful transaction via the Master Endpoint. When Payer opened the Parallel Form, master transaction initiated an auxiliary transaction for the payment method selected on the form. Once the auxiliary transaction received final sucessful status, it triggered final successful status on the master transaction:

Master Endpoint Transaction Example

Payment Page Display Logic

Payment Cashier transactions can be initiated with API requests or via Virtual Terminal on UI. When Connecting Party (merchant or payment facilitator which represents merchant) sends a request to Master Endpoint, the Payneteasy system returns Parallel Form URL, HTML content of which is defined on the Master Endpoint level. When payment method is selected on Parallel Form, Payneteasy system returns HTML content of this payment method form template specified on the respective Auxiliary Endpoint level (or displays external payment form instead).
Each payment method has its own payment page display logic. Payment Cashier might have multiple transactions initiated within the same payment session, because it can have multiple payment methods available for the Payer. When Payer selects payment tab appropriate auxiliary transaction is initiated.

  skinparam ConditionEndStyle hline
  : (1) Initiate transaction;
  if ((2) Additional Payer input required?) then (yes)
  : (3) return input form;
  : (4) submit form;
  else (no)
  endif
  if ((5) External form required?) then (yes)
  : (6) request external form from the payment provider;
  : (7) redirect to external form;
  : (8) submit form on payment provider side;
  else (no)
  endif
  : (9) show wait form;
  : (10) process transaction;
  : (11) show finish form or redirect \nto Connecting Party website;

(1) Transactions can be initiated with API requests, batch upload or via Virtual terminal on UI. Each payment method has its own payment page display logic.

Note

Payment Cashier might have multiple transactions initiated within the same payment session, because it can have multiple payment methods available for the Payer. When Payer selects payment tab, respective auxiliary transaction is initiated.

(3) For credit card payment method form is displayed on Payment Gateway side and can be customized. See Payment Page Customization. Some other payment methods may have additional forms on Payment Gateway side. Contact support for details.
(7) Some payment methods require the Payer to be redirected to their own form. That form is not hosted by Payment Gateway and can`t be customized.
(9) Until transaction reaches final status, Payment Gateway displays Wait Form for the Payer.
(11) After the transaction reaches the final status, Payment Gateway displays Finish Form for the Payer or Redirect to Connecting Party website.

Note

For all templates and macros for customization see Forms Customization