1.17. Google Pay™ App

Introduction

Google Pay™ is an electronic wallet system that allows making one-click payment using a card stored securely on Google side. There is no need to enter card details during Google Pay™ transaction.
Access to the payment mechanism is possible from any device, which supports Google Pay™.
After choosing Google Pay™ payment method, the payer will see the form on which he confirms his Google account and card he is going to use to pay for order. If payer doesn’t have a previously registered card, he may do it while making payment.

See terms definitions in Glossary.

Integrate Google Pay™ in App with the following steps:

1. Read and accept Terms of Service.
5. Follow the transaction flow instructions. Google Pay™ Sale Flow.

How to integrate Google Pay through Payneteasy

Already our client   Not our client yet
If you are Payneteasy client, you can get in touch with your manager or contact us here.   Contact our sales team and we’ll create a test account for you and help to integrate Google Pay in a week.

Terms of Service

The following rules must be complied to use Google Pay™:
The following rules must be complied to use Google Pay™ on mobile apps:

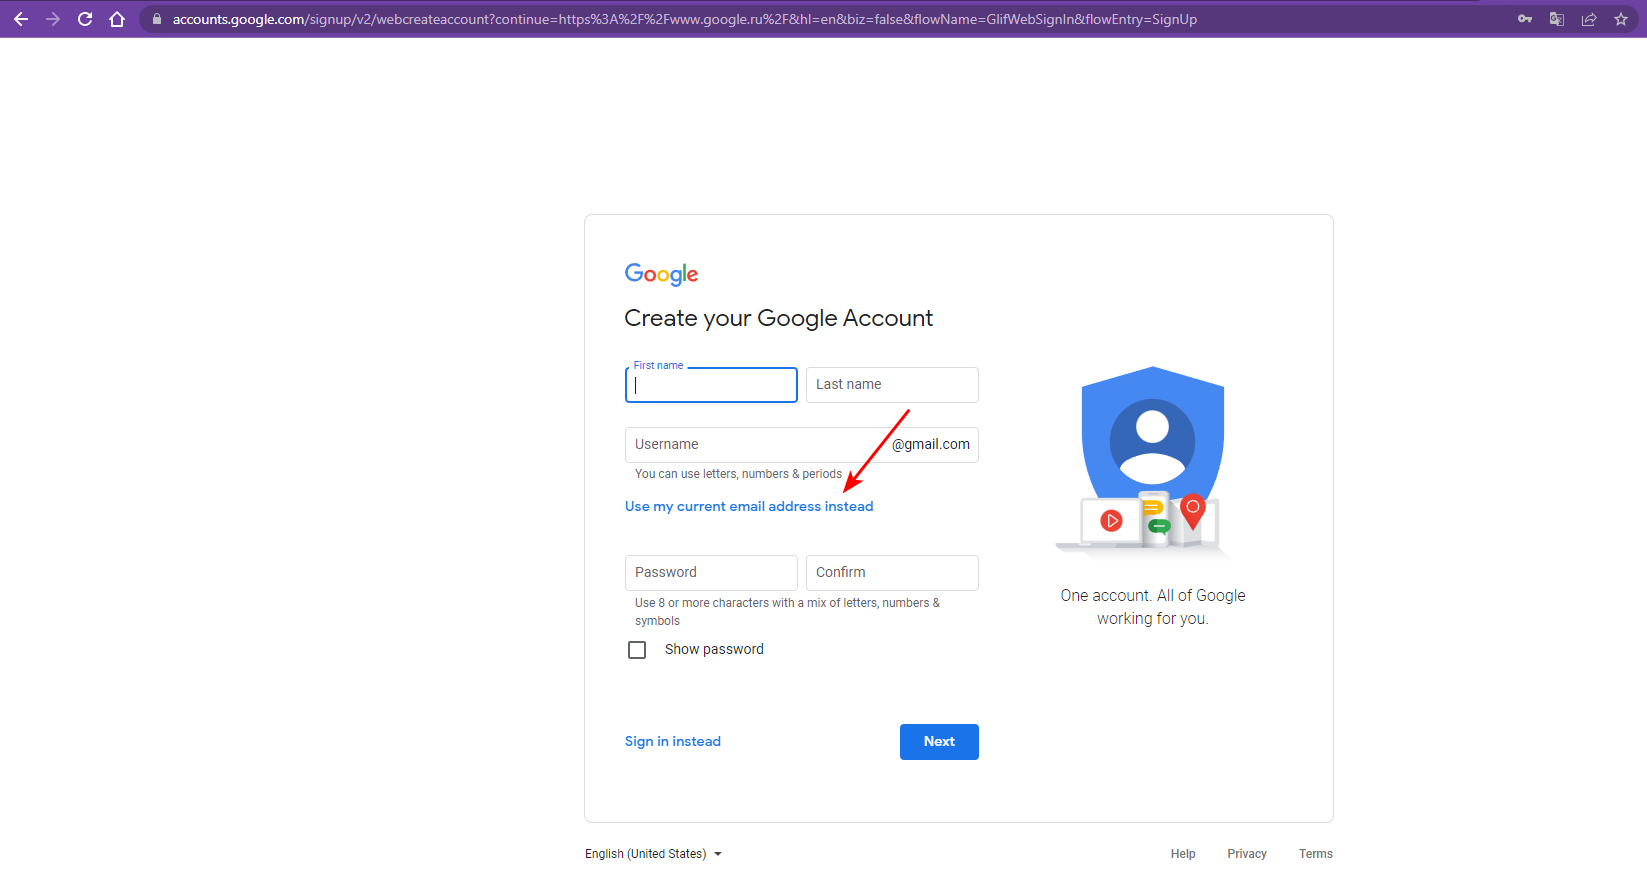
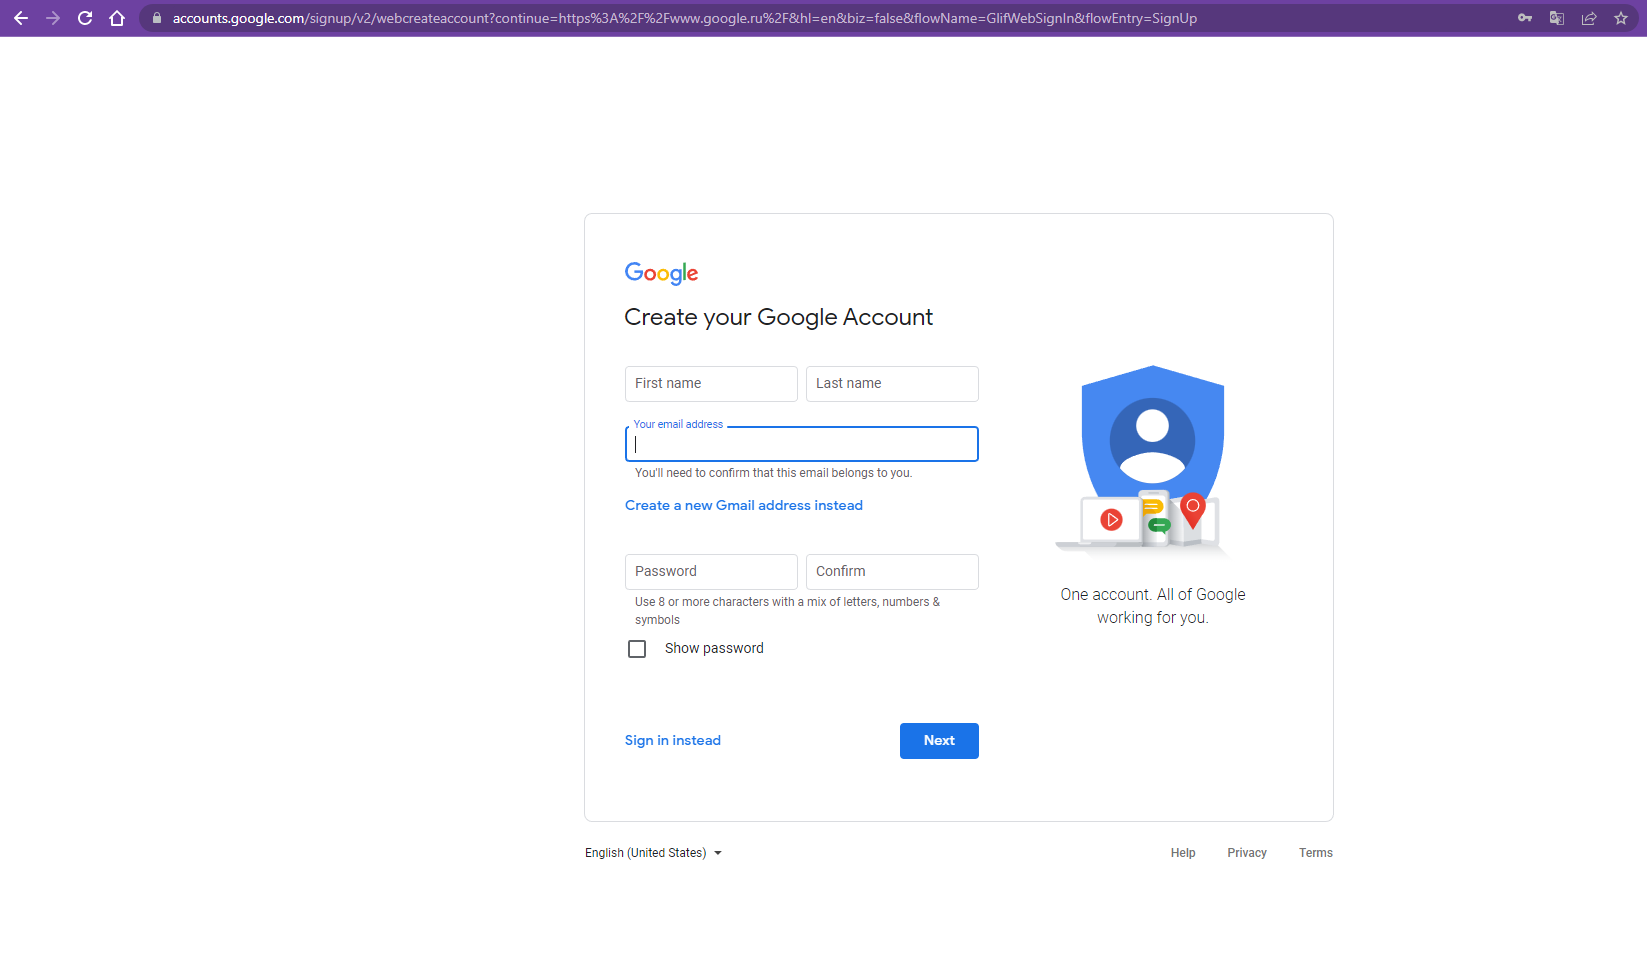
Google Pay™ Account Setup

  1. Connecting Party must register in Google Console. Instead of gmail, Connecting Party can use a corporate email address.

../_images/gpay-1.png ../_images/gpay-2.png
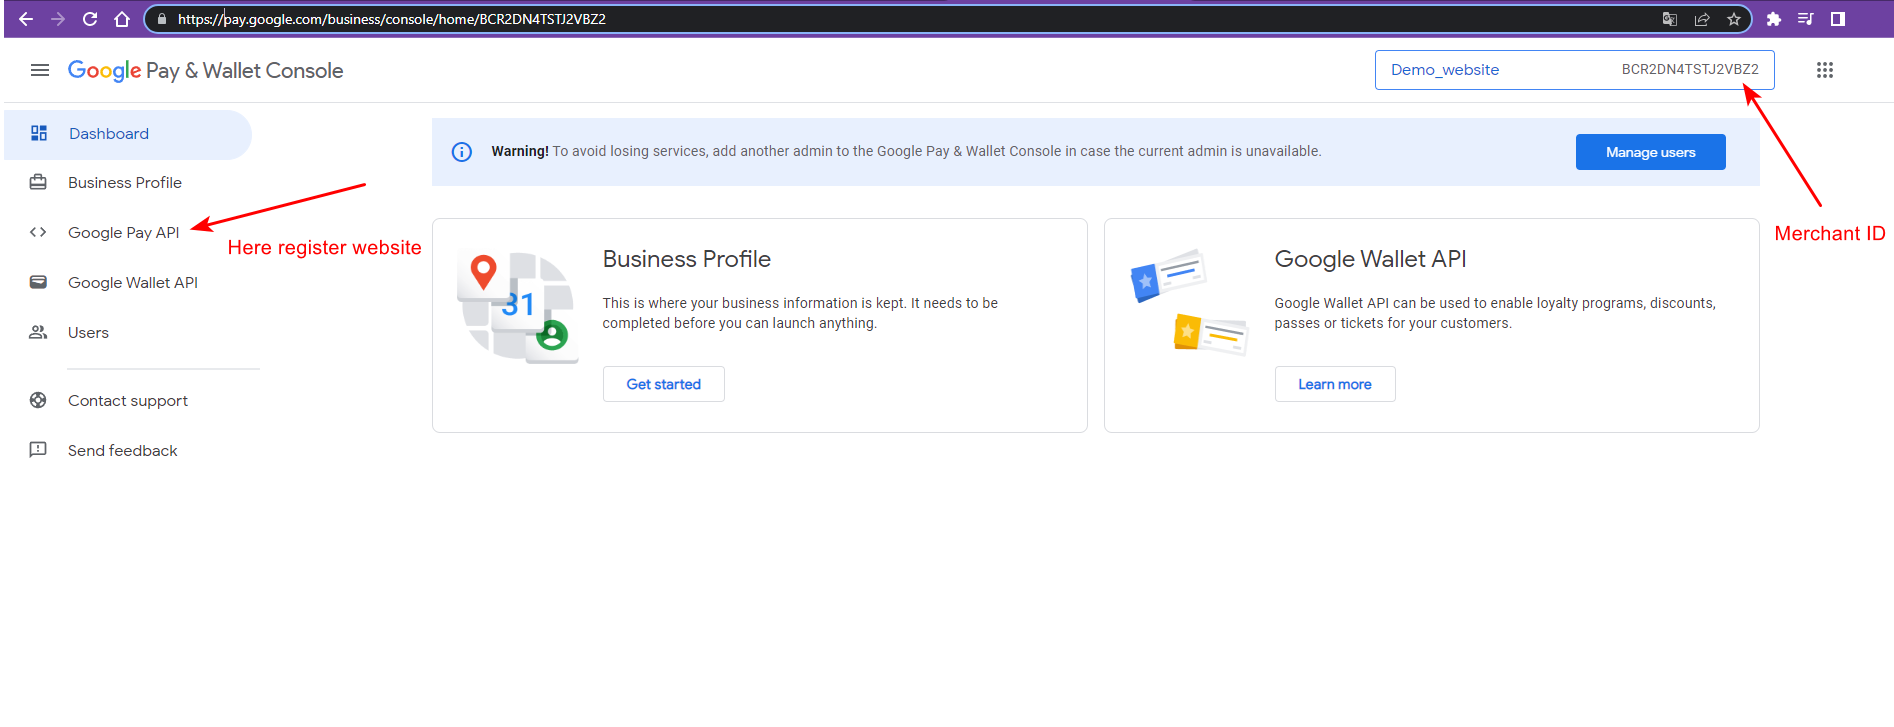
  1. Then, from the account screen in the console, save the Merchant ID and proceed to the registration of the website in the Google Pay API section.

../_images/gpay-3.png
  1. Add a website using the “Add website” button.

../_images/gpay-4.png
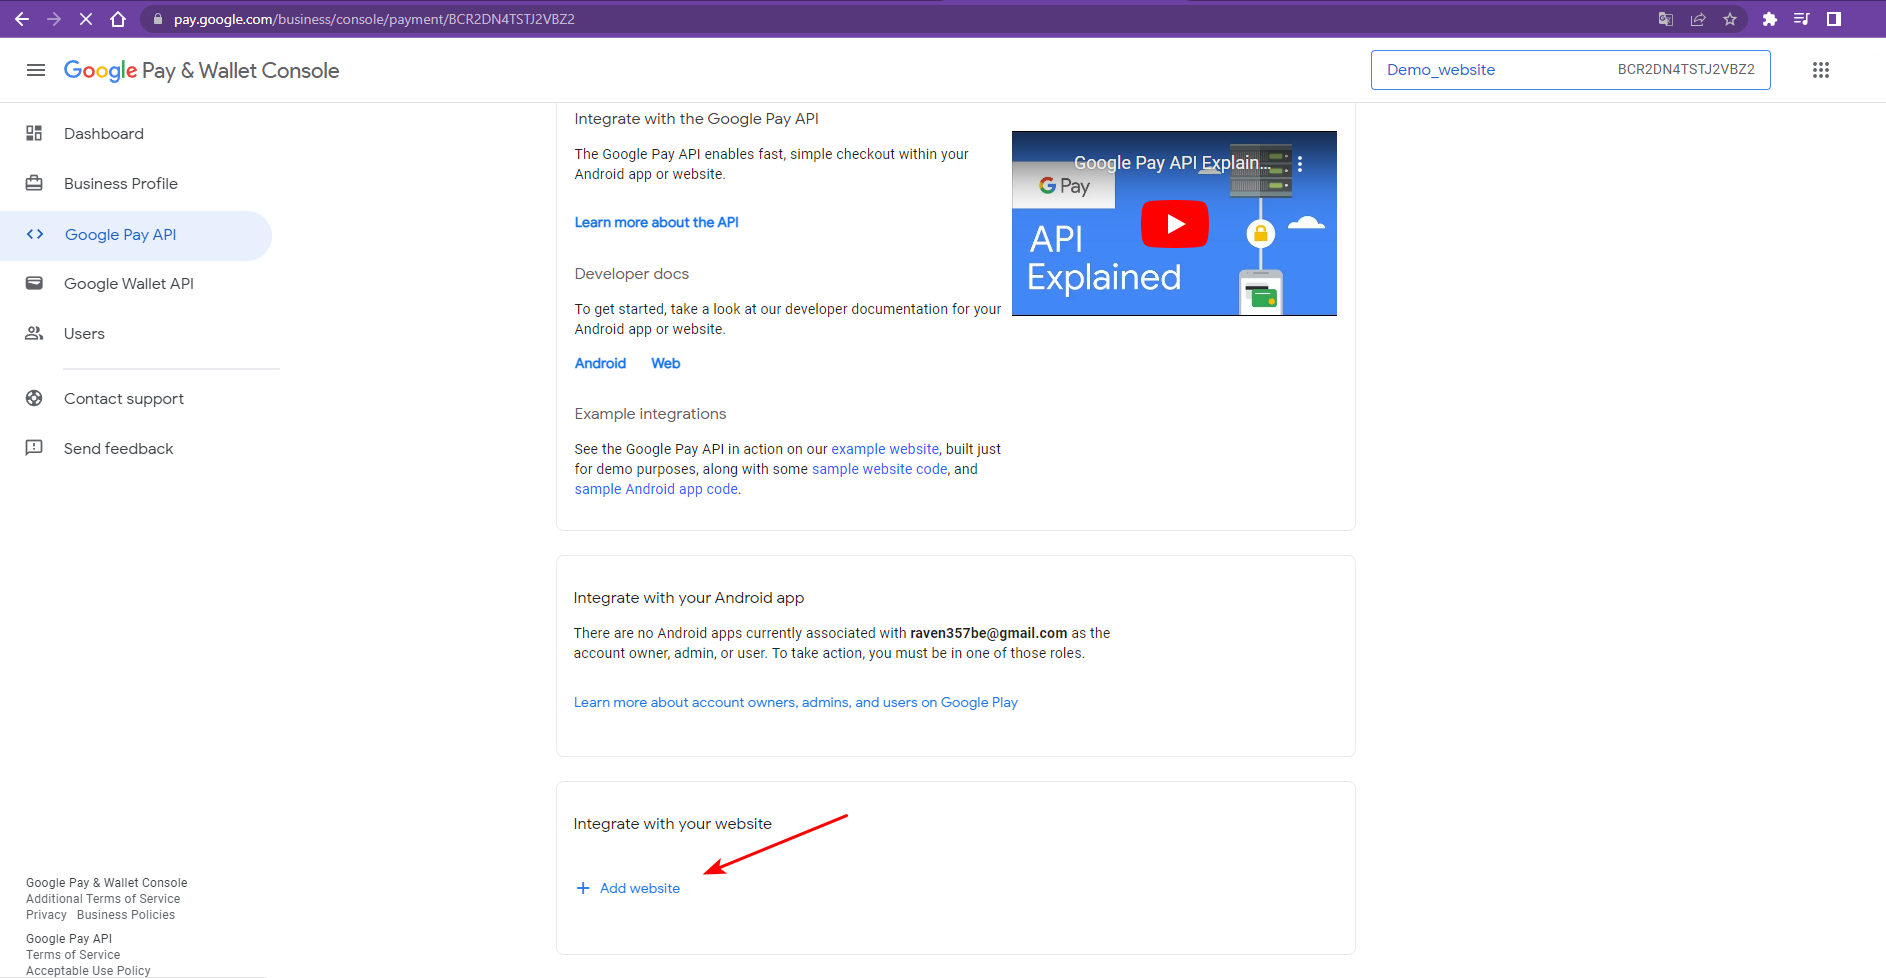
  1. Specify screenshots of the checkout and payment form in the website settings, as well as integration type = Gateway and the address of the Connecting Party’s website from where the purchase starts.

../_images/gpay-5.png
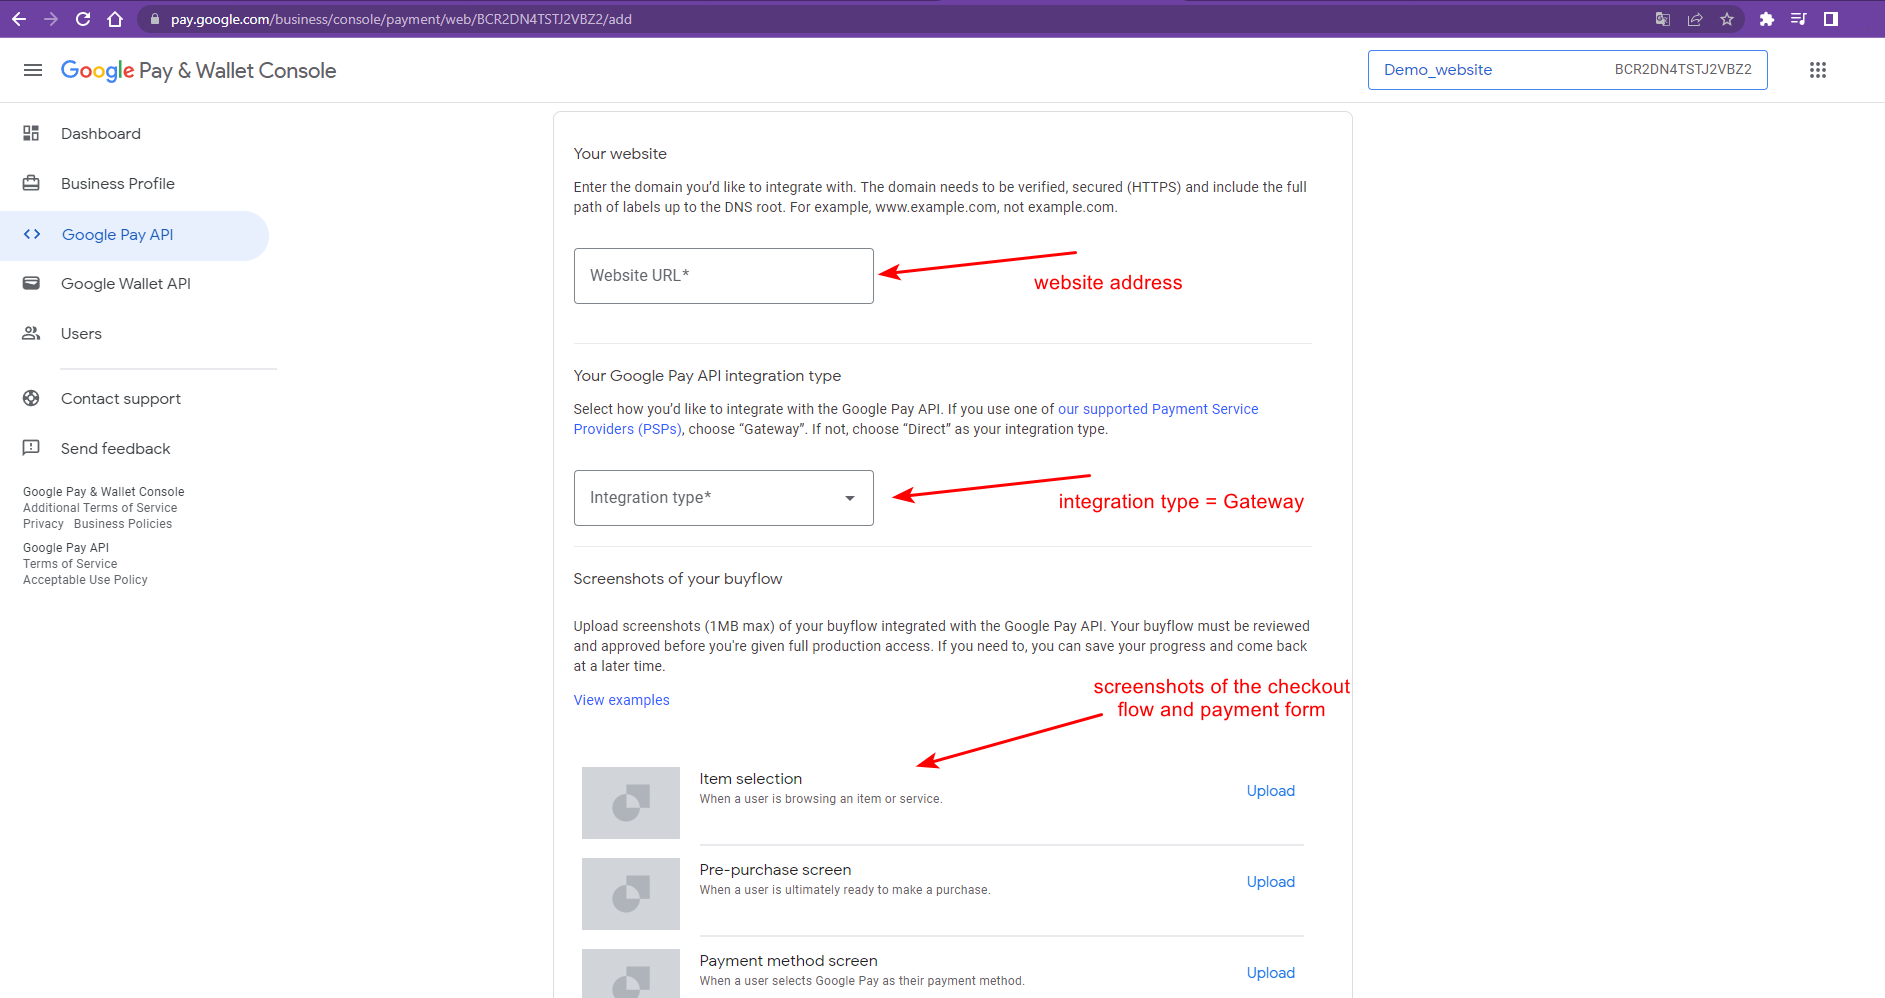
  1. Send the website address and Merchant ID to Payneteasy support managers.

Google Pay™ Integration in an Android App

Google Pay™ integration in an Android app supports only CRYPTOGRAM_3DS (tokenized) authentication type. All requests using PAN_ONLY (non-tokenized) authentication type will be automatically declined.

Google Pay™ Authentication Types

Connecting Party can independently choose the card types in Google Pay™ that will be available for payment. The card type is specified in the allowedAuthMethods Google request parameter.
There are two card types (authentication methods):
  1. PAN_ONLY (non-tokenized) - cards stored in payer`s Google account. These cards available on any device of the payer.
    The token contains the number and expiration date of the physical card. That is why 3-D Secure authentication is required for these cards. 3DS is required for PAN_ONLY cards. It can be indicated by the Success==3DS in Google payment response. 3-D Secure authentication does not differ from the standard 3-D Secure.
  2. CRYPTOGRAM_3DS (tokenized) - cards that are stored tokenized on the payer’s device. Tokenized cards are only available on the device where the card was added to the Google Pay™ app.
    The token contains the number and expiration date of the virtual card as well as the 3-D Secure cryptogram. Customer 3-D Secure verification for tokenized cards is not required.

Google Pay™ Allowed Networks

Payment Gateway supports all networks specified in the allowedCardNetworks Google request parameter, such as: VISA, MASTERCARD, etc. For the complete list of allowed networks refer to Payneteasy support.

Required Parameters for Google Pay™ Integration

  1. Register with Google, accept Google Terms of Service, and receive a Google merchant ID after website passes a Google review.

  2. Request googleMerchantGatewayID from Payneteasy support, which looks like: eXXX.mXXX.gate.payneteasy.eu, where:

    eXXX - endpointID
    mXXX - merchantID
    An example of googleMerchantGatewayID: e123.m567.gate.payneteasy.eu
  3. Set gatewayID=google.gatewayid.

  4. ENDPOINTID or ENDPOINTGROUPID received from Payneteasy support.

  5. Control-key and Connecting Party login received from Payneteasy support.

Google Pay™ Sale Flow

skinparam roundcorner 20
skinparam sequenceArrowThickness 2
skinparam ParticipantPadding 30
actor "Payer" as p
participant "Connecting Party\n mobile app" as m
participant Payneteasy as ppg
autonumber "(##)"
p -> m: checkout
activate m
== Retrieve Google Pay token data ==
m -> m: Check if Google Pay is available on the device
m --> p: Payment screen \ncontaining GooglePay button
activate p
p -> m: Press GooglePay button
deactivate p
m -> m: Create PaymentRequestData
m -> m: Call loadPaymentData\nPayneteasy, merchantGatewayId \nRetrieve Google Pay token
== Purchase Payment Request ==
m -> ppg: /mapi/v1/sale/ENDPOINTID\nencrypted-type=googlepay\nencrypted-data=hex(Google Pay token json)
activate ppg
ppg --> m: type=async-response, paynet-order-id=orderId
ppg -> ppg: Check signature and decrypt token data
alt authMethod=CRYPTOGRAM_3DS
ppg -> ppg : Process payment
else authMethod=PAN_ONLY
ppg-> ppg: stop processing\nset status=declined
end
== Status Request ==
m -> ppg: /api/v2/status/ENDPOINTID\n orderId=orderId
ppg--> m: Response\nstatus,order-stage
deactivate ppg
m--> p: Show payment result
deactivate m

(2)-(6) To implement retrieving of Google Pay token data within mobile application, please follow official tutorial from Google: https://developers.google.com/pay/api/android/guides/tutorial.
(7) To implement Mobile API sale request, see /mapi/v1/sale/.
(12) To implement order status request see /api/v2/status/. Status should be requested multiple times with 3-5 seconds interval until final status will be received in response.